



Where Should You Put Blush? Try the Placement on Your Own Face
Blush placement is the most argued question in makeup communities, and the answers contradict each other. This guide settles it: the placement for each look, matched to your face shape, tried on your own photo.
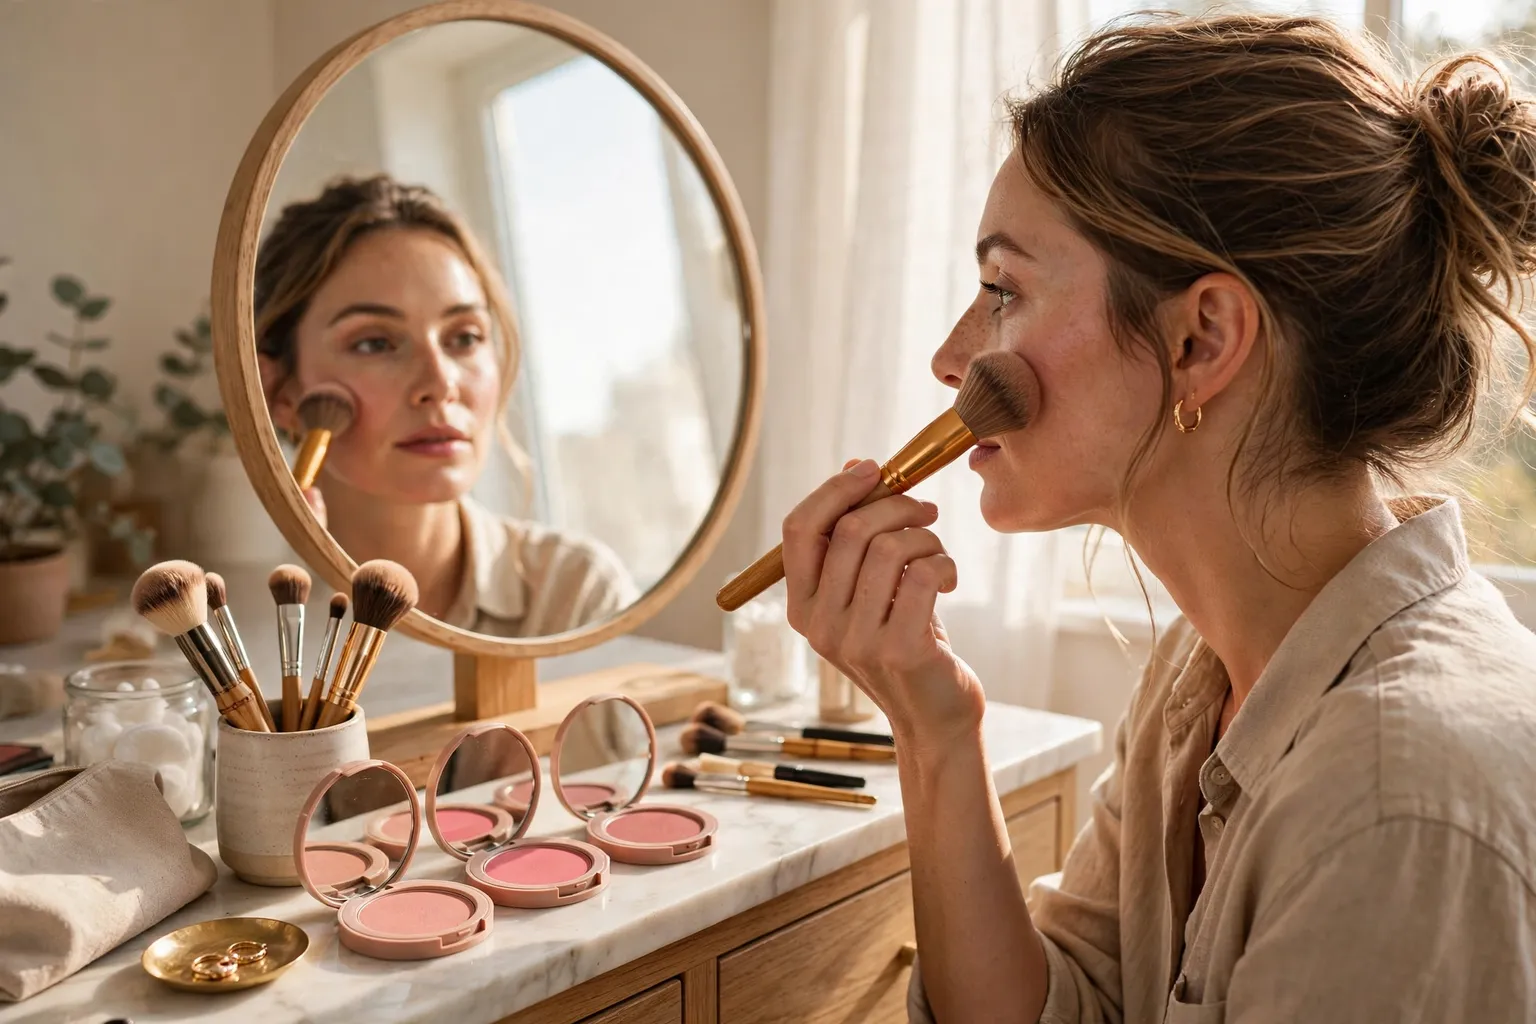
The whole question in one frame: the brush on the cheek, and the spot it lands on deciding the look.
Direct answer
Put blush where the look you want lives: high on the cheekbones for a lifted look, on the apples for a flushed look, and just under the cheekbones for a sculpted look, then adjust for your face shape, and try each placement on your own photo before you settle on one.
That sentence is the whole method. Pick the look first, then the spot, then adjust for your face shape, and check it on your own photo. The rest of this guide fills in each step: where each placement sits, which face shapes it suits, the mistakes that undo it, and how to try all three on your photo in a few minutes.
Key takeaways
- Placement changes the whole face: the same blush reads lifted, flushed, or sculpted depending on where it sits.
- Lifted means high on the cheekbones, toward the temples. Flushed means the apples of the cheeks. Sculpted means just under the cheekbones.
- Face shape moves the target: round faces lift higher, long faces stay wider, square faces soften the corners.
- The two mistakes to avoid are blush too close to the nose and blush too low on the cheek.
- Try every placement on your own photo before you buy or commit, since no rule beats seeing it on your face.
Why does blush placement matter so much?
Blush is the one product that changes the shape of your face, not just its color. A lipstick changes your lips, an eyeshadow changes your eyes, but blush moves the eye up or down the cheek, widens or narrows the face, and makes the whole face read lifted or tired. That is why the same blush can look completely different on two people, and why placement advice that ignores your face shape fails half the people who follow it.
It is also why makeup communities argue about it more than almost any other step. One person swears by the apples, another by the cheekbones, and both are right for their own faces and wrong for each other's. The advice rarely names the face shape it assumes, so readers follow a rule built for someone else's bone structure. The fix is not a better rule. It is matching the placement to the look you want and the face you have, and checking it on your own photo before you commit.
Where should you put blush for a lifted look?
For a lifted look, put blush high on the cheekbones and sweep it upward toward the temples. Find the top of the cheekbone with your fingers, place the color just above it, and blend up and out, never down toward the mouth. The lift comes from the direction: color placed high and blended upward pulls the eye up, which is the whole effect.
This placement suits round and square faces best, because both benefit from height. Round faces gain definition above the fullest point of the cheek, and square faces gain softness when the color sits high instead of wide. Use a light hand and build in thin layers, since a heavy patch high on the cheek reads as a stripe rather than a lift. Step back and check at arm's length: the lift should read as a shape, not as a line.
Where should you put blush for a flushed, natural look?
For a flushed, natural look, put blush on the apples of the cheeks and blend outward toward the ears. The apples are the roundest part of the cheek when you smile gently, and color there reads as warmth from within rather than as structure. This is the just came in from the cold look, and it suits almost every face when the hand is light.
Place the color slightly above the fullest point of the apple, because the apple drops when your face relaxes, and color placed at the lowest point slides down with it. Blend the edges until no line is visible, and keep the color inside the cheek rather than dragging it toward the nose or the ear. Long and oval faces suit this placement best, since width across the cheek balances length without adding height.
Where should you put blush for a sculpted look?
For a sculpted look, put blush just under the cheekbone, sweeping from the middle of the cheek back toward the ear. The color sits in the hollow beneath the bone, which reads as shadow and makes the cheekbone above it stand out. This is blush doing the work of contour, with a softer edge and a more wearable color.
Keep the line short: start no closer than two finger widths from the nose, and stop before the ear, so the sculpt stays on the cheek instead of striping the whole side of the face. Blend upward into the cheekbone so the edge disappears. Round and heart shaped faces suit this placement best, since the hollow adds definition where the face is fullest. Do not drag the color below the corner of the mouth, or the sculpt turns into a droop.
How does blush placement change by face shape?
Round faces should place blush higher and more angled than the apples, sweeping up toward the temples, since height breaks up width. Long faces should do the opposite, keeping blush wide and horizontal across the apples, since vertical lines add length the face does not need. Square faces should place blush high and soft, avoiding the jaw corners, so the color lifts rather than widens.
Heart shaped faces should balance a wider forehead by placing blush on the apples and blending slightly outward, which fills the narrower lower face. Oval faces have the most freedom, since most placements read well, and the choice becomes the look you want rather than a correction. If you are unsure of your face shape, try all three placements on your own photo through /makeup-try-on and keep the one that makes your face read the way you want it to. Our makeup guide covers the full look around the blush: /blog/what-makeup-suits-me.
What are the most common blush placement mistakes?
The first mistake is blush too close to the nose, which pulls the face inward and makes the eyes look closer together. Keep two finger widths between the nose and the start of the color, for every placement. The second mistake is blush too low on the cheek, which drags the face down even when the color itself is perfect. If your blush looks tired rather than fresh, the spot is almost always too low, not the shade.
The third mistake is an unblended edge, which reads as a stripe in daylight even when it looked soft in the mirror. Blend until the color fades into skin with no visible line. The fourth mistake is the wrong shade for your undertone, which no placement can fix: warm skin glows in peach and coral, cool skin in pink and berry, and olive skin in muted rose and warm terracotta. Find your undertone first with our guide: /blog/find-your-skin-undertone. The fifth mistake is judging placement only in store light, which flatters everything. Check it in daylight, at arm's length, before you decide.
Does cream or powder blush change where you put it?
The placement stays the same, but the formula changes how forgiving it is. Cream blush blends into skin with fingers or a damp sponge, which makes the flushed placement on the apples the easiest to get right, since the edge melts away on its own. Powder blush holds a sharper edge, which suits the sculpted placement under the cheekbone, where a defined hollow is the point.
If you are new to placement, start with cream on the apples, since mistakes blend out in seconds. If you want the sculpted or lifted placement to last all day, set a cream base with a light powder in the same shade family. Either way, the spot matters more than the formula: a cream in the wrong place drags the face down just as surely as a powder does.
How do you try blush placements on your own photo?
Take a clear photo of yourself in daylight, facing the camera, with your full face visible and no heavy filter on it. Open /makeup-try-on, upload the photo, and try the lifted placement first, then the flushed placement, then the sculpted placement, saving each one. Your first preview needs no account, and you only sign up to save or download a look.
Judge the three saved photos side by side, at arm's length, against the clothes you actually wear, not one by one up close. The winner is the placement that makes your face read the way you wanted, lifted, flushed, or sculpted, without drawing attention to the blush itself. If none of the three wins, adjust one variable at a time: move the color half an inch higher, or soften the edge, and try again. If you are unsure which tool fits a different question, the picker at /tools lists them all.
A try on shows the placement on your photo, not a promise
A photo try on shows you the placement on your own face, which is far more information than a diagram or a description gives you. It is not a guarantee: screens and lighting shift color, a cream and a powder sit differently on skin, and a placement can read differently in daylight than under shop lights. Check the winning placement in daylight before you buy anything, and blend the edge until no line is visible.
Take the theory out of it.
Blush placement is a makeup question, so this guide points at the makeup try on rather than the picker. Upload one photo, try the lifted, flushed, and sculpted placements, and keep the one that makes your face read the way you want. The first preview needs no account.
Questions people ask
Where should beginners put blush?
Start on the apples of the cheeks and blend outward toward the ears, since that placement is the most forgiving and the easiest to control. Use a light hand and build the color in thin layers, checking in daylight after each layer. Try the placement on your own photo first, so you learn the spot on your face rather than on someone else's.
Should blush go on the apples of your cheeks?
Yes for a flushed, natural look, but the apples are one placement among three, not the only correct spot. Place the color slightly above the fullest point of the apple, since the apple drops when your face relaxes and color placed at the lowest point slides down with it. Lifted looks sit high on the cheekbones and sculpted looks sit just under them, so the right spot follows the look you want.
Where do you put blush for a lifted look?
Put blush high on the cheekbones and sweep it upward toward the temples, blending up and out rather than down toward the mouth. The lift comes from the direction of the blend, which pulls the eye upward across the cheek. Round and square faces benefit most, since height breaks up width and softens corners.
Does blush placement change with face shape?
Yes, because the same placement reads differently on different bone structures, and advice that ignores face shape fails half the people who follow it. Round faces lift higher and more angled, long faces stay wide and horizontal, square faces stay high and soft, and heart shaped faces fill the apples outward. Oval faces have the most freedom, and the choice becomes the look you want rather than a correction.
Can I try blush placements on my own photo before buying?
Yes, through the makeup try on, which shows each placement on your own photo so you can compare lifted, flushed, and sculpted side by side. Your first preview needs no account, and you only sign up to save or download a look. Save the winning placement photo, since it shows the spot on your skin instead of describing it in words.